Honeywell RTH8500D Manual⁚ A Comprehensive Guide
This guide provides a complete overview of the Honeywell RTH8500D programmable thermostat, covering installation, programming, troubleshooting, and advanced features. Learn how to access the manual, download the PDF version, understand key functions, and resolve common issues. Detailed instructions are provided for optimal performance and user experience.
Accessing the Honeywell RTH8500D Manual
Locating your Honeywell RTH8500D manual is straightforward. Several avenues exist for accessing this crucial resource. Firstly, you can explore the Honeywell website, specifically the “Your Home” section (yourhome.honeywell.com). This online portal often hosts downloadable PDF versions of user manuals for various Honeywell products, including the RTH8500D. The website’s search function can quickly lead you to the correct document. Alternatively, numerous third-party websites specializing in appliance manuals provide access to the RTH8500D manual. These sites frequently compile manuals from various manufacturers, offering a centralized location to find user guides. Remember to verify the legitimacy and safety of such websites before downloading any files. Finally, if you retained the original product packaging when purchasing your thermostat, the manual might be included within the box. Check carefully; it’s often tucked inside a separate sleeve or compartment. Should all else fail, contacting Honeywell customer support directly via phone or email might prove useful in obtaining a copy of the RTH8500D manual.
Downloading the PDF Manual
Downloading the Honeywell RTH8500D manual as a PDF offers several advantages. A PDF allows for convenient offline access, eliminating the need for an internet connection to review the instructions. This is especially useful for troubleshooting situations where immediate access to the manual might be crucial. Furthermore, a PDF can be easily printed, providing a hard copy for reference. This printed version proves helpful in situations where working with an electronic device might be impractical or unsafe, such as near water or in environments with limited technological access. To download the PDF, begin by navigating to the Honeywell website’s support section or a reputable third-party manual website. Locate the RTH8500D model and look for a downloadable PDF option. Once you find it, click the download link and save the file to your computer or mobile device. The file size is typically manageable, ensuring a quick download process. After downloading, open the PDF using a suitable PDF reader application, available on most operating systems. Remember to verify the file’s integrity and source to ensure it’s a genuine Honeywell document before use. Having a readily available PDF version of the manual provides a convenient and reliable resource for all your RTH8500D thermostat needs.
Understanding Key Features
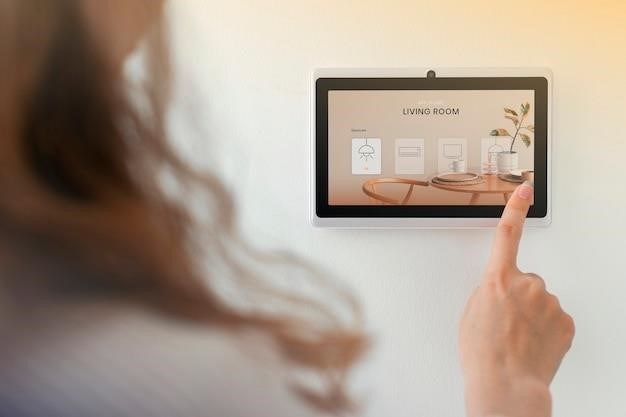
The Honeywell RTH8500D boasts a range of features designed for user convenience and energy efficiency. Its prominent touchscreen interface provides intuitive navigation and clear display of temperature settings and system status. The 7-day programmable scheduling allows for customized temperature adjustments based on daily routines and preferences, optimizing energy consumption and comfort. This programmable feature ensures that the thermostat automatically adjusts the temperature to the desired settings at specified times, minimizing energy waste during periods of inactivity or absence. The RTH8500D is compatible with both 24 Vac heating and cooling systems and 750 mV heating systems, making it suitable for a wide variety of home setups. Additionally, the unit incorporates a user-friendly interface, making programming and adjustments straightforward. The system’s intelligent design anticipates user needs and responds to temperature fluctuations efficiently. Furthermore, several advanced features offer further customization options, such as temporary hold settings to override scheduled programs temporarily, providing flexibility for unexpected situations. The clear display ensures that the current temperature and set temperature are easily visible at all times, providing constant feedback to the user. The intuitive design simplifies the process of setting and adjusting the temperature, ensuring a seamless user experience.
Installation Guide⁚ Wiring and Setup
Before commencing the installation of your Honeywell RTH8500D thermostat, it’s crucial to switch off the power to your heating and cooling system at the furnace or circuit breaker panel; This safety precaution is paramount to prevent any electrical shocks or damage to the equipment. Begin by carefully labeling the wires from your existing thermostat, noting their corresponding letters or colors. This step is essential for accurate reconnection to the new thermostat. Once the power is safely disconnected, remove your old thermostat and carefully examine the wiring. Match the labeled wires from your old thermostat to the corresponding terminals on your new RTH8500D unit, ensuring a precise connection. Refer to the wiring diagram provided in your Honeywell RTH8500D manual for detailed guidance on connecting the various wires—’R’, ‘W’, ‘G’, ‘Y’, ‘C’, and ‘B’ terminals—to their respective positions. Double-check all connections to ensure they are secure and properly seated to avoid malfunctioning. After connecting all the wires, carefully mount the new thermostat onto the wall plate, following the instructions provided. Finally, restore power to the system and verify the functionality of the thermostat by checking the display and ensuring that the heating and cooling systems respond correctly to temperature adjustments. Always consult the complete installation guide for detailed step-by-step instructions.
Programming Your Thermostat⁚ Setting Schedules
The Honeywell RTH8500D offers flexible programming options to optimize your home’s comfort and energy efficiency. To begin, access the programming menu through the intuitive touchscreen interface. The thermostat’s clear display guides you through the process of creating personalized schedules. You can establish different temperature settings for various days of the week and times of the day, tailoring the environment to your lifestyle. For instance, you might set a lower temperature during sleeping hours and a higher temperature during waking hours to conserve energy and maintain comfort. The RTH8500D allows you to create up to four separate periods within a day, providing granular control over your home’s temperature. Each period can be customized with specific temperature settings, ensuring that your home is always at the perfect temperature for your needs. Utilize the “Hold” feature to temporarily override the programmed schedule, allowing for spontaneous adjustments without disrupting the long-term plan. The intuitive interface makes navigation seamless, and the on-screen prompts provide clear guidance through each step. Remember to consult the complete manual for a detailed explanation of all programming options and capabilities. Once your desired schedule is set, the thermostat will automatically adjust the temperature according to your preferences, ensuring maximum comfort and energy efficiency throughout the week.
Troubleshooting Common Issues
Experiencing problems with your Honeywell RTH8500D thermostat? This section helps you diagnose and resolve common issues. First, check the power supply. Ensure the thermostat’s batteries are fresh and correctly installed. Low battery power can lead to erratic behavior or complete failure. Next, verify the thermostat’s wiring connections. Loose or incorrectly connected wires can prevent the thermostat from communicating with your HVAC system. Refer to the wiring diagram in your manual for correct placement. If the display is blank or shows error codes, consult the manual’s troubleshooting section for detailed explanations and solutions. Common error codes often indicate specific problems, such as a faulty sensor or communication failure. If the thermostat is not responding to your commands, try resetting it by removing the batteries for a few minutes, then reinstalling them. This often clears minor software glitches. If the temperature isn’t accurate, check the thermostat’s location. Avoid placing it near direct sunlight, drafts, or heat sources, as these can affect its readings. For persistent problems, ensure the HVAC system itself is functioning correctly. Call a qualified HVAC technician if you suspect a problem beyond the thermostat’s control. Before contacting customer support, gather information on the issue, including error codes and any steps you’ve already taken for troubleshooting. Proper troubleshooting will save time and expedite resolution.
Addressing Temperature Inaccuracies
Inaccurate temperature readings on your Honeywell RTH8500D thermostat can stem from several factors. First, ensure the thermostat is correctly positioned. Avoid placing it in direct sunlight, near vents, or on exterior walls, as these locations can significantly impact temperature readings. Ideal placement is on an interior wall away from direct heat or cold sources. Next, check for obstructions. Make sure nothing blocks the thermostat’s sensor, preventing it from accurately detecting the room’s temperature. Dust or debris accumulating on the sensor can also interfere with its accuracy. Gently clean the sensor using a soft cloth or compressed air. If the problem persists, verify the calibration of the thermostat. Consult your manual for instructions on recalibrating the unit, if this function is available. In some cases, a factory reset may be necessary to restore accurate temperature readings. Remember to record your current settings before resetting to avoid reprogramming the entire thermostat. If the issue continues after these steps, the problem might lie with the HVAC system itself, rather than the thermostat. A malfunctioning sensor in the furnace or air handler can cause inaccurate temperature readings even with a perfectly functioning thermostat. In such cases, it’s advisable to contact a qualified HVAC technician for professional diagnosis and repair. They possess the tools and expertise to identify and resolve deeper issues within your HVAC system.
Resolving Connectivity Problems (if applicable)
Connectivity issues with the Honeywell RTH8500D, if applicable to your model, often arise from router placement, network interference, or thermostat settings. Begin troubleshooting by checking the distance between your thermostat and your Wi-Fi router. If the thermostat is too far from the router, the signal strength might be too weak to maintain a stable connection. Try moving the router closer to the thermostat or using a Wi-Fi extender to boost the signal. Next, evaluate potential sources of interference. Other electronic devices operating on the 2.4 GHz frequency, such as microwaves or cordless phones, can interfere with the Wi-Fi signal. Try temporarily disabling these devices to see if that improves the connection. Ensure your thermostat’s Wi-Fi settings are correct. Verify that the thermostat is connected to the correct Wi-Fi network and that the password is entered accurately. Incorrect settings can prevent the thermostat from connecting to your home network. If necessary, consult your router’s documentation for details on how to check the network name (SSID) and password. Sometimes, a simple restart can resolve connectivity problems. Power cycle both your thermostat and your router by unplugging them from their power sources, waiting a few minutes, and then plugging them back in. Finally, consider reinstalling the Honeywell app on your smartphone or tablet. A corrupted app can sometimes interfere with the connection between the app and the thermostat. Deleting and reinstalling the app can often resolve this issue. If these steps fail to restore connectivity, contact Honeywell customer support for further assistance. They may have additional troubleshooting steps or may need to investigate potential problems with your thermostat’s hardware.
Battery Replacement and Maintenance
Maintaining your Honeywell RTH8500D thermostat involves regular battery checks and occasional cleaning. The thermostat’s battery life will vary depending on usage and environmental conditions, but you’ll typically receive notifications when batteries are low. To replace the batteries, locate the battery compartment, usually on the back of the thermostat. Consult your specific model’s manual for precise instructions; however, generally, it involves opening the compartment, removing the old batteries, and inserting fresh ones, ensuring correct polarity. Always use batteries of the recommended type and voltage to avoid damaging the thermostat. For optimal performance, choose high-quality batteries known for their longevity. Periodically clean your thermostat to remove dust and debris that can accumulate on the touchscreen. Use a soft, slightly damp cloth to gently wipe the screen. Avoid using harsh chemicals or abrasive cleaners, as these can damage the surface of the touchscreen. Inspect the wiring connections at the back of the thermostat. Make sure all wires are securely connected and that there’s no loose wiring. Loose connections can interrupt the signal transmission and affect the thermostat’s functionality. If you notice any corrosion on the wire terminals, carefully clean them with a wire brush or contact cleaner. Regular maintenance, including battery replacement and cleaning, ensures the long-term reliability and accuracy of your Honeywell RTH8500D thermostat. By following these simple steps, you can extend its lifespan and maintain optimal performance for years to come. Remember to always consult the official Honeywell RTH8500D user manual for detailed instructions and safety precautions.
Advanced Settings and Customization
Beyond basic programming, the Honeywell RTH8500D offers several advanced settings to personalize your climate control experience. These settings allow for fine-tuning and optimization based on individual preferences and household needs. Accessing these settings usually requires navigating through the thermostat’s menu system. The exact steps may vary depending on the firmware version of your thermostat, so refer to your user manual for precise instructions. One common advanced setting is the ability to adjust the temperature deadband, which is the range of temperatures where the system remains inactive to prevent rapid cycling. Fine-tuning the deadband can improve efficiency and comfort. Another adjustable parameter might be the fan settings; you could configure the fan to run continuously or only when heating or cooling is active. This can impact energy consumption and indoor air quality. Some models may allow for customization of display options, including brightness and backlight duration. These features enhance user comfort by optimizing screen visibility in different lighting conditions. Consider exploring options for advanced scheduling, such as creating multiple schedules for different days of the week or even for different times within a single day. This granular control allows you to optimize energy usage based on occupancy patterns and personal preferences. Depending on your model, you might find features like setting up vacation holds for extended periods when you’re away from home. This can further conserve energy and maintain a comfortable temperature upon your return. Remember to consult your user manual for detailed explanations and guidance on utilizing these advanced settings effectively and safely.
Safety Precautions and Warnings
Before installing or operating the Honeywell RTH8500D thermostat, carefully review the following safety precautions and warnings to ensure safe and proper operation. Always disconnect power to the heating and cooling system at the circuit breaker or fuse box before commencing any wiring or installation work. Failure to do so could result in electrical shock or injury. Never attempt to modify or repair the thermostat yourself unless you are a qualified electrician. Improper modifications can void the warranty and potentially create a fire or electrical hazard. The thermostat should only be installed in a location that is protected from extreme temperatures, moisture, and direct sunlight. Exposure to harsh conditions could damage the thermostat and compromise its functionality. Proper ventilation around the thermostat is crucial to prevent overheating. Obstructing airflow can lead to malfunction or damage; When replacing batteries, use only the recommended type and size to avoid leakage and potential damage to the thermostat’s internal components. If battery leakage occurs, immediately clean the battery compartment and replace the batteries. Contact Honeywell customer support for assistance if you experience any unusual behavior or error codes. Always consult a qualified professional for any complex issues or repairs. Keep the thermostat away from children to prevent accidental damage or misuse. The thermostat is not a toy and should be handled with care. Ensure that the thermostat is properly grounded to prevent electrical shock. If you are unsure about any aspect of installation or operation, contact Honeywell customer support or a qualified technician. Following these safety precautions will ensure the longevity and safe operation of your Honeywell RTH8500D thermostat.
Understanding Error Codes and Messages
The Honeywell RTH8500D thermostat employs a system of error codes and messages to indicate potential problems or malfunctions. Understanding these codes is crucial for quick troubleshooting and resolving issues. The display screen will show an alphanumeric code or a descriptive message when an error is detected. Refer to the complete manual for a comprehensive list of all possible error codes and their corresponding meanings. Common error codes might include indications of sensor failures, wiring problems, communication errors (if applicable to a Wi-Fi enabled model), or issues with the heating/cooling system itself. Each error code typically provides a clue to the problem’s source. For instance, an error relating to a specific sensor might suggest that the sensor needs to be checked for proper connection or potential malfunction. A wiring error code might require a review of the wiring connections to ensure they are correctly matched to the thermostat terminals. If the error persists after checking wiring and connections, it may indicate a more serious problem with the heating or cooling system components themselves. In such cases, professional assistance from a qualified HVAC technician is advisable. Never attempt to repair the thermostat or related systems yourself unless you are a qualified professional. The manual provides contact information for Honeywell customer support, which can assist in interpreting error codes and offer troubleshooting guidance. Always refer to the comprehensive troubleshooting section of the manual for detailed guidance before contacting support. Remember to note down the exact error code or message for easier communication with support personnel.